Quilling is great fun and a feast for your creative side.
Quilling a Jhumka is super easy. The
great thing about a Quilled Jhumka is that you can try many designs and create one
according to the outfit and or your requirement.
For all those who do not know what a Jhumka is – it’s a
bell or dome shaped earring that is traditional to wear and adds ethnicity to
any outfit.
A Jhumka can be fashioned in any way you want- small to
large, Decoupage with design of your choice, Hand painted or using liquid
embroidery.
My favorite is when I get to play with beads and stones
and ball chain etc. you can make a new design every time you make one.
Soutache method of attaching beads to the Quilled Jhumka
is a bit tricky but the end result is worth the effort. Let us begin
Things required for making a Quilled Jhumka with Soutache
are
1.
5mm
strips in your favorite color
2.
Headpins
3.
Beads, bead caps and bead spacer of your choice
4.
Pearl beads( you can try glass beads or silver
or golden balls)
5.
Ball chain
6.
Scissors
7.
Beading needle and thread
8.
Glue
9.
Mod Podge/ Varnish
10.
Quilling tool
11.
Quiling coach
12.
Quilling mould
13.
Brush
14.
Scissors
15.
Pliers
·
Step 1:
Take 7 to 8 Strips of 5mm and
attach them end to end. Making a long strip, start rolling them from one end
with the help of slotted tool and Quilling coach. Make a tight coil and flatten
it out with the help of coach
·
Step 2
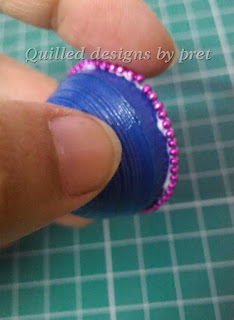
With the help of the mould, make
a dome shape. Make sure they are smooth and equal in size.
·
Step 3
With the help of brush or finger
spread out Glue under each dome. Make sure the layer of Glue covers every part
of the inside of the dome. TIP: Don’t apply a thick layer.
·
Step 4
With help of brush apply Varnish
or Mod Podge, it not only hardens the dome but gives a gloss to your Quilled Jhumka.
Let it dry completely TIP : Use a Needle tool or tooth pick to hoist the dome.
·
Step 5
Use ball Chain and attach it on
the tip of the dome.
·
Step 6
Using a beading needle or any
normal needle bead some pearl beads. Once you have enough length apply some Glue
and make sure that you put these beaded thread on top of the Glue. Make sure
that the thread doesn’t stick on the dome. Wait till the beads stick and then
pull the thread. You will be amazed to see the finished look.
·
Step 7
Repeat Step 5
·
Step 8
Insert the headpin in the dome
and using your choice of bead caps etc roll the tip of the pin and attach it
with ear hook.
Repeat the same step with the
other dome.
TA-DA… a pair of Jhumka is
ready. I was really excited to see the end result. I was so proud of myself for
finishing and all in one go. I know it takes some practice to bead and stick it
on the Jhumka, but I just loved the finished piece.
Try one for yourself now....


No comments:
Post a Comment